Multi-factor authentication configuration for Ivanti EPMM
The user should be capable of using multi-factor authentication by enabling multi-factor authentication setting on Azure.
To support multi-factor authentication in Sentry OAuth, you must configure one Sentry for OAuth and another Sentry for multi-factor authentication using Tunnel.
Sentry 9.14 and 9.15 supports Azure AD Conditional Access Policy.
For more information, see Configuring conditional access rules in Azure.
Configuring multi-factor authentication on Azure
Before you begin
-
Verify that you have Sentry 9.15.0 and newer versions.
Procedure
-
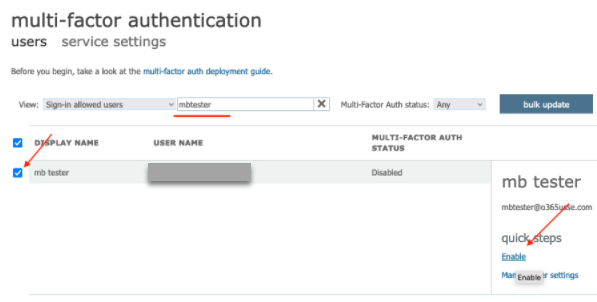
Login to Azure portal with admin credentials.
The admin must be a super admin with premium features to configure multi-factor authentication for other users.
-
Click Users and search for the user to enable multi-factor authentication.
-
Select Per-user MFA.
The multi-factor authentication page opens to configure the user.
-
Select the checkbox to enable the user.
If multi-factor authentication is not enabled, the status of multi-factor authentication shows disabled. -
Select Enable in the menu on the right.
-
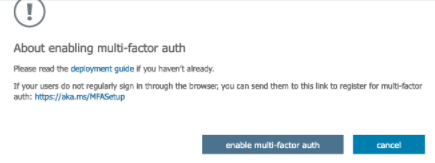
Enabling the user displays a prompt to enable multi-factor authentication for the specific user.
-
Click enable multi-factor auth.
A confirmation message displays after enabling multi-factor authentication.
-
The user OAuth status is now changed to Enabled.
Configuring native email on Ivanti EPMM for multi-factor authentication
Procedure
-
On one Sentry, configure OAuth. See OAuth for Sentry on Ivanti EPMM.
-
On a different Sentry, configure VPN on Ivanti EPMM UEM.
-
On Ivanti EPMM, click Policies and Config.
-
Create a local Scep using local CA.
-
Under Add, select VPN from the drop-down .
-
Configure the following fields on Add VPN Setting window.
-
Connection Type: MobileIron Tunnel
-
Sentry - Select the second Sentry from the drop-down.
-
Sentry service: TCP
-
Provider type: App Proxy
-
Identity certificate: Local Scep from drop-down.
-
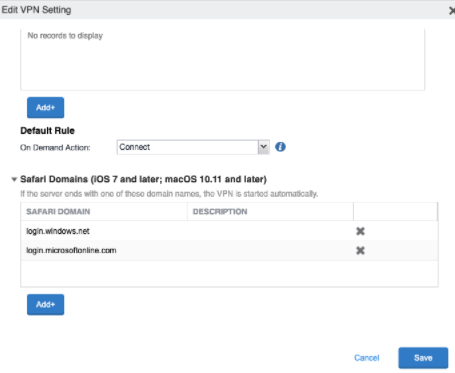
Open Safari domain section, add the following MS domains:
-
login.windows.net
-
login.microsoftonline.com
-
-
Save the settings and apply the label.
-
-
-
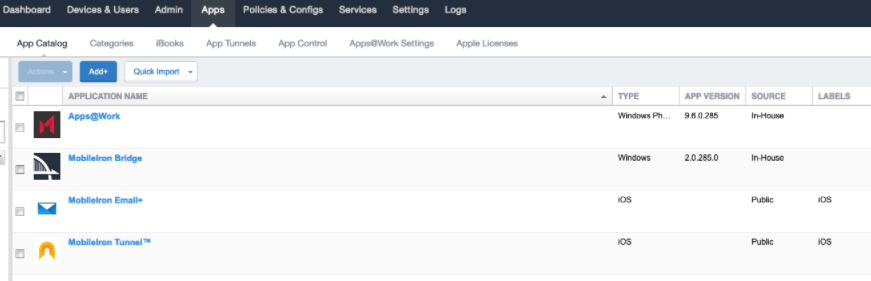
Configure Ivanti Tunnel application in Apps > App Catalog.
-
Register the device with Office 365 user and complete the MDM enrollment.
-
Download Ivanti Tunnel application from Apps@work and complete the device registration.
-
Launch Native mail application and click on Edit settings option.
The user is now redirected to Microsoft online to enter the password. -
Enter the password.
The user is now prompted for MFA on the device.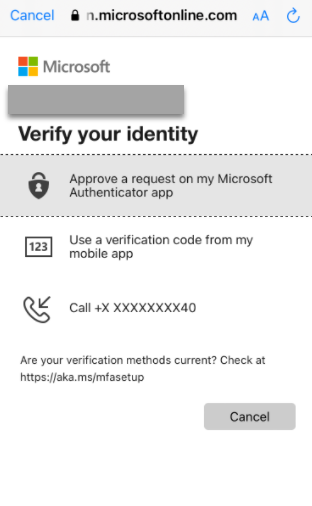
-
After selecting MFA option, authentication is successful and user is redirected back to the mailbox.
Configuring OAuth for Android Email+ on Ivanti EPMM
Before you begin
-
Verify that you use Office 365 and have an Office 365 certificate.
Procedure
-
On Core, click Policies and Configs > Configurations > Add New > Certificate Enrollment > Single File Identity.
-
Add the Office 365 certificate.
-
On Core, click Apps and perform the following steps:
-
Select Google Play and search for Ivanti Email+ application.
-
Under App Configurations, select Email+ application:
-
Enable Install this App for Android Enterprise.
-
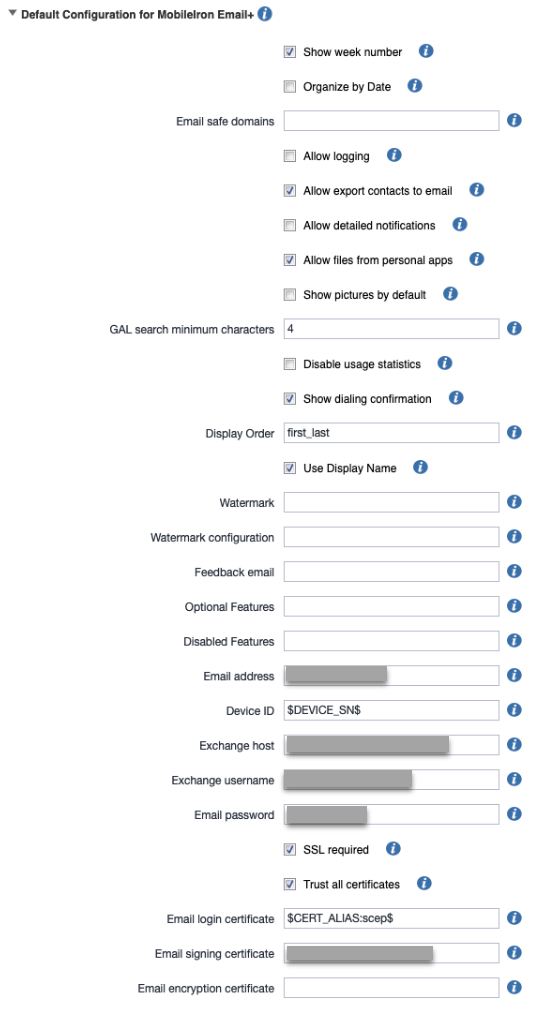
Under Configuration choices, select the default configuration :
-
Configure Email address
-
Device ID
-
Exchange host: Sentry 1 server hostname
-
Exchange username
-
Email Password
-
Enable SSL required and Trust all Certificate options
-
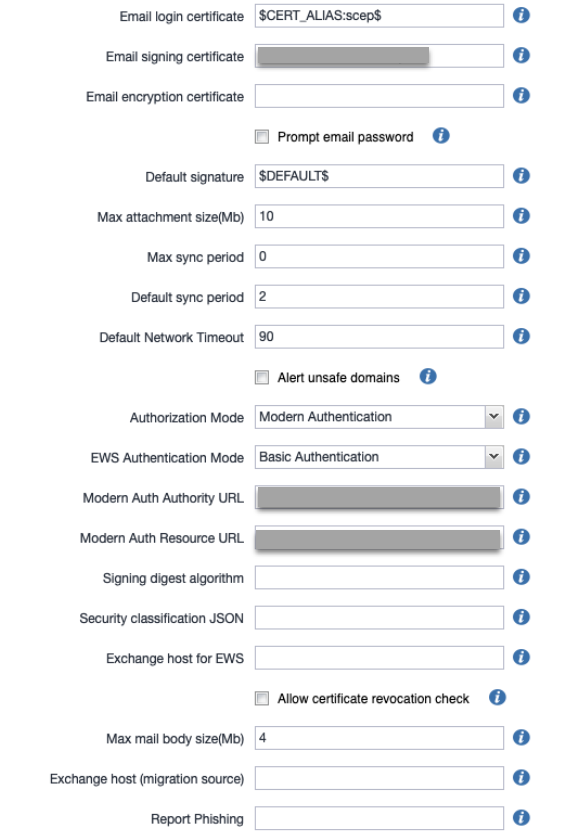
Configure email login certificate
-
Configure email signing certificate
-
-
Select Authorization mode
-
Authorization mode: Modern Authentication
-
EWS Authentication mode: Basic Authentication
-
Configure Modern Auth Authority URL
-
Configure Modern Auth resource URL
-
Apply the configuration and click Finish.
-
Register the device with MDM and install Android Enterprise Work Profile.
-
Install Tunneland Email+
-
Download Tunnel application.
-
Launch Email+ application and authenticate.
-
Enter the password to authenticate.
The user is now prompted for MFA on the device.
-
-
Configuring OAuth for Android Enterprise Email+ on Ivanti EPMM
-
On the first Sentry, configure OAuth. See OAuth for Sentry on Ivanti EPMM.
-
Configure another Sentry hostname on Tunnel application and complete the following steps on Ivanti EPMM:
-
On Ivanti EPMM, click Apps.
-
Click Add > Google Play > select Ivanti Tunnel.
-
Enable Install this app for Android Enterprise.
-
Configure Sentry server hostname as Sentry 2.
-
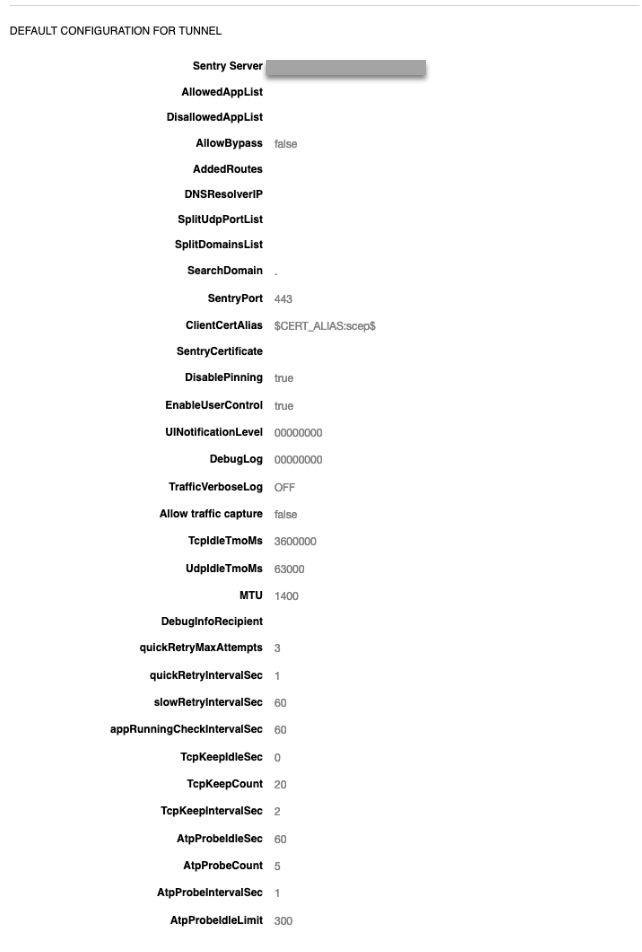
Configure Client CertAlias.
-
Save the configuration and apply the labels.
Configuring OAuth for iOS Email+ on Ivanti EPMM
Before you begin
-
Verify that you have a second Sentry with appconfig.
Procedure
-
On the first Sentry, configure OAuth. See OAuth for Sentry on Ivanti EPMM.
-
On the second Sentry, configure Email+ for iOS.
-
On Ivanti EPMM, click Services > Sentry > Add new Sentry.
-
On Sentry configuration, update the following fields:
-
Enable App Tunnel.
-
Upload Identity Certificate (local CA) for Device Authentication.
-
Under Services, click Configure ANY service.
-
Save Sentry settings.
-
-
Click Policies and Config and update the following:
-
Click Policies and select Default App Connect global policy.

-
Edit the policy and enable App Connect.
-
Enable Authorize security policy and save the settings.
-
Click Policies and Config and select Configuration. Update the following:
-
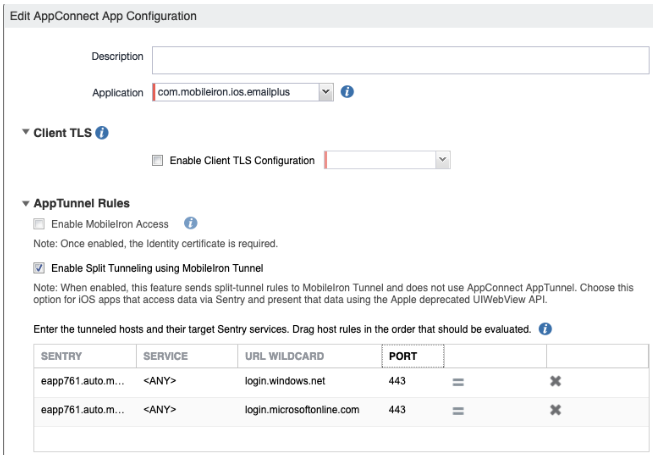
In Add New, select AppConnect > App Configuration.
-
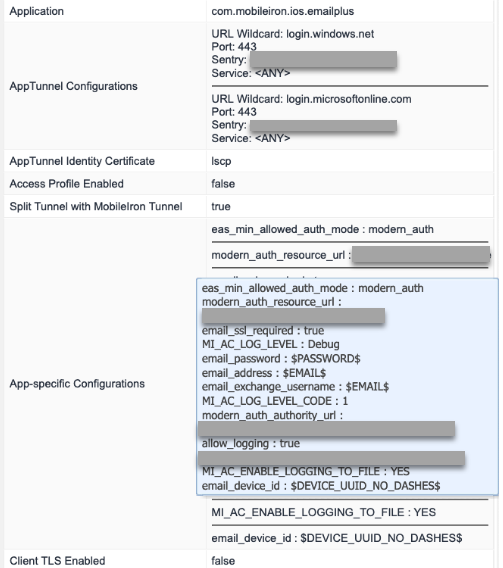
Configure Application Bundle ID for Email+.
-
Enable Split Tunnel rules.
-
Under Tunneled hosts and configured services:
-
Add Sentry 2 from the drop-down.
-
Select Any Service.
-
URL wildcard: login.windows.net
-
Port: 443
-
Add another Sentry and select the Sentry and Service Name same as above.
-
-
URL wildcard: login.microsoftonline.com
-
Port: 443
-
-
Configure Email+KVPs under App specific configurations: